We’ll start with a Quick-Start Baseline and Planning to lock in model specifics, operating hours, and maintenance history, then outline tasks to minimize downtime. Next, we’ll run System Diagnostics to verify intake, vents, connections, and interlocks, plus daily checks of pressure, temperature, motor current, and anomaly logging. We’ll establish a practical Preventive Maintenance cadence with clear tasks, frequencies, and roles, and enforce Oil Management, Safety and Pre-Start checks, corrective actions, documentation, and accountability to keep the system reliable and safe, if you want to know what comes next.
Key Takeaways
- Establish a quick-start baseline by identifying model, operating hours, maintenance history, and key performance metrics for targeted tasks.
- Conduct daily diagnostics to verify pressure, temperature rise, motor current, and log anomalies with calibration of sensors.
- Execute air filter inspection and replacement by depressurizing, checking resistance, and ensuring a proper seal with correct orientation.
- Implement oil management with correct grade, keep temps, set/change intervals, and verify oil level after running checks.
- Define corrective actions with documented results, assign roles, and ensure task mapping minimizes production disruption while restoring peak performance.
Build Your Quick-Start Servicing Plan for an Air Compressor
To build your quick-start servicing plan for an air compressor, we begin by identifying the exact model, operating hours, and maintenance history to set a precise baseline. We then outline targeted tasks that minimize downtime and maximize reliability. Our plan emphasizes quick start diagnostics to confirm electrical supply stability, motor health, belt tension, and uncoupled reeds where applicable. We document sensor readings, discharge pressures, and temperature trends to establish baseline performance. Next, we specify oil filtration recommendations, selecting filters and intervals aligned with product manuals and operating conditions. We implement a stepwise checklist for initial start-up, ensuring safety interlocks and lubrication schedules are satisfied. Finally, we assign owners, timelines, and acceptance criteria to verify that the baseline and early adjustments meet defined performance goals.
Perform Daily Diagnostics You Can Do in Minutes
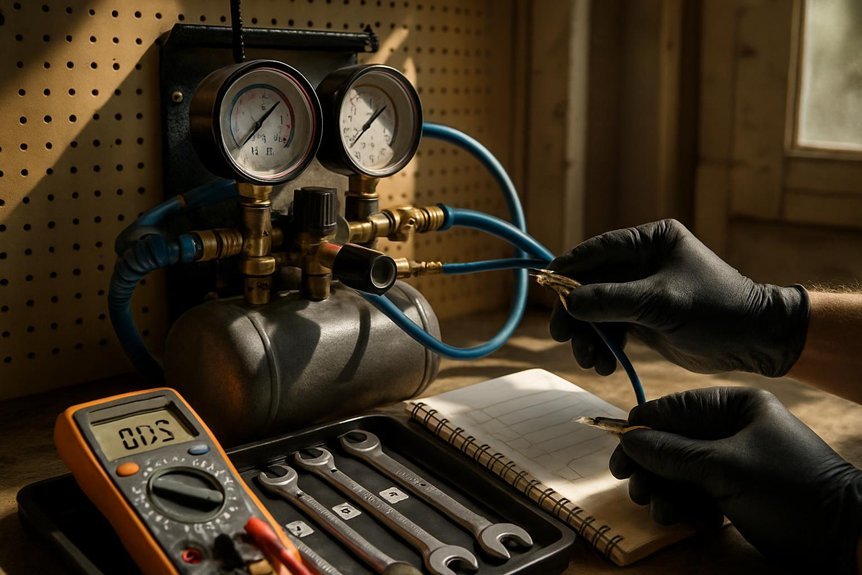
Are you maximizing uptime with quick daily checks that catch issues before they escalate? We approach daily diagnostics with disciplined steps that take minutes, not hours. We verify vital indicators: pressure consistency, temperature rise, and motor amperage against baseline values. We perform a brief inspection for audible anomalies and vibration, documenting any deviations. We conduct daily calibration of gauges and sensors to ensure readings reflect actual conditions, correcting misalignments promptly. We listen for unexpected noise patterns and apply noise reduction measures that don’t compromise safety or function. We confirm cooling cycles operate within spec and that compressor cut-in/cut-out delays align with load. We log results, flag anomalies, and schedule targeted checks if thresholds are breached. This routine sustains reliability without disrupting production.
Inspect and Replace Air Filters: A Simple Step-by-Step

Do you routinely check air filters to prevent airflow restrictions and efficiency loss? We approach this task with a precise, repeatable procedure. First, power down and depressurize the system, then tare the housing to access the filter. Inspect air filters for visible dirt, dust buildup, and fiber damage; note any resistance to airflow or swelling of the media. If inspection reveals contaminants beyond acceptable limits, proceed to replace filters. Remove the old element carefully to avoid dislodging debris into the intake plenum. Install the new filter so orientation arrows align with the airflow direction, ensuring a snug seal. Reassemble the housing, restore power, and run a brief test. Document the date and part numbers for traceability, and maintain a filter replacement schedule based on operating conditions.
Check Oil: How Much, What Type, and When to Change It
Oil level, type, and change intervals are critical for compressor reliability, so we check each parameter methodically. We begin with oil levels: verify the dipstick or sight glass shows within the recommended range while the unit is off and cool. Refill only with the specified oil, avoiding overfill. Next, oil types: use the manufacturer’s approved grade and viscosity; never substitute unless explicitly permitted. Record the current level and type in our log for trend tracking. Finally, change intervals: establish a schedule based on duty, hours, and ambient conditions, and perform changes at or before the recommended milestone. After draining, we run a brief fill to confirm proper circulation, then recheck levels. Maintain cleanliness and use clean containers to prevent contamination.
Do Safety Checks Before Every Use
We start every use with a quick safety check of our gear and the unit itself. We’ll verify that all safety equipment is present and functional, and perform pre-start checks on the compressor, hoses, and connections. This disciplined, methodical approach lets us identify potential faults before operation and protects both personnel and equipment.
Inspect Safety Gear
To guarantee safe operation, we perform safety checks before every use of the air compressor: we inspect PPE, verify the shield and guards are intact, and confirm that hearing and eye protection meet standards. We systematically assess safety gear for wear, damage, and proper fit, reserving replacements when any compromise is found. We confirm that personal protection elements—gloves, respirators, and high-visibility apparel—comply with current regulations and manufacturer guidelines. We verify that helmets and face shields remain undamaged and securely fastened, with seals intact. We check that protective footwear and hearing protection provide adequate attenuation. We document any deficiencies and rectify immediately. Our approach prioritizes consistent standardization, traceability, and real-time risk reduction, ensuring users maintain uncompromised safety gear throughout operation.
Pre-Start Checks
Before starting the compressor, we perform a structured pre-start checklist to verify readiness and minimize risk. We approach start up readiness with disciplined checks that ensure safe operation and control confidence. We prioritize critical systems and confirm that power priorities align with the load requirements. We communicate any anomalies before energizing, preventing accidents and equipment damage.
- Inspect hoses, fittings, and connections for wear, leaks, or damage; replace as needed.
- Verify guards, covers, and safety interlocks are in place and functional.
- Confirm oil level, pressure relief, and tank integrity; test gauges and alarms.
- Power up in the correct sequence, verify electrical ground, and test start/stop controls.
Clean and Maintain the Tank, Valves, and Hoses
We’ll start by cleaning the tank system, removing moisture, and verifying it’s free of debris. Next, we’ll inspect the valves and hoses for wear, cracks, or leaks, and replace components as needed. This checks-and-maintains approach guarantees reliable operation and accurate pressure control.
Clean Tank System
How clean is your tank system? We approach maintenance with a measured, methodical routine to ensure reliability and safety. We perform a controlled clean tank process, verify components, and document results, focusing on preventing moisture carryover and contaminant buildup. Our goal is consistent air quality and reduced wear.
- Drain condensate completely, then flush lines to remove sediment and sludge.
- Wipe and sanitize accessible surfaces; inspect for corrosion, cracks, or buildup.
- Conduct a system purge, testing during reassembly to confirm proper flow and pressure.
- Refill with correct oil or lubricant if required, and seal fittings to prevent leaks.
Inspect Valves Hoses
We now turn to Inspect Valves Hoses to ensure the tank system remains clean and reliable. We present a concise, methodical check sequence for valves and hoses. Begin with valves inspection: verify operation of safety, relief, and unload valves, noting any sticking, leakage, or abnormal sounds. Test manual release functionality and reseal threads with appropriate torque. Inspect hose integrity by examining for cracks, bulges, kinks, and wear at fittings; replace compromised hoses immediately. Check hose and fitting connections for tightness, corrosion, and oil contamination, cleaning as needed. Confirm no blockage restricts airflow, and that condensation drains function properly. Document findings, calibrate if required, and replace any component outside spec to maintain system reliability and performance.
Troubleshoot Common Performance Issues
Common performance issues with air compressors arise from improper airflow, incorrect pressures, and worn components. We approach troubleshooting with a structured method to preserve troubleshooting efficiency and ensure efficient airflow throughout the system. We identify root causes, verify settings, and implement corrective actions, documenting results for repeatability.
- Check intake and vent lines for obstructions or leaks, reseating connections as needed.
- Validate operating pressure against tool demands; adjust regulators to match required ranges.
- Inspect valves, belts, and intercooler passages for wear, glazing, or fouling; replace or clean as appropriate.
- Monitor temperature and vibration signals, addressing abnormal readings to prevent further performance loss.
Create a Practical Maintenance Schedule That Sticks
Maintaining peak performance starts with a practical, repeatable maintenance schedule built from what we’ve just verified. We’ll define a clear cadence, assign responsibilities, and document results so issues don’t slip through. Our approach uses concise checklists, time-based triggers, and condition-based actions, ensuring consistency across shifts. To implement, we map tasks to equipment status, noting tolerances and acceptable variances. This creates accountability and measurable improvements, with minimal disruption to production. The following table outlines core activities and frequencies.
| Task | Frequency | Responsibility |
|---|---|---|
| Inspect seals and belts | Weekly | Tech |
| Drain condensate, verify pressure | Daily | Operator |
| Lubricate bearings, check gauges | Monthly | Tech |
Two word idea A, two word idea B.
Frequently Asked Questions
How Often Should You Replace the Motor Bearings?
We replace motor bearings when their lifespan is exhausted or performance degrades, typically every 2–5 years under normal use. We check bearing lifespan during routine maintenance and guarantee motor alignment is precise to prevent premature wear. We adjust accordingly.
What Are Signs of Hidden Compressor Air Leaks?
We notice hidden leak signs early, like a ghost in the line; we’d track this through maintenance scheduling and methodical checks. We detect murmurs, pressure drops, and increased run-time, addressing faults promptly to prevent efficiency loss.
How to Identify Incorrect Regulator Pressure Settings?
We identify incorrect regulator settings by noting pressure misreadings, improper setup, and calibration drift; we verify against a calibrated gauge, adjust the regulator, recheck, and document results to guarantee consistent operating pressure and system safety.
Which Refrigerant Oil Is Compatible With My Unit?
We recommend checking your unit’s label or manufacturer datasheet for refrigerant compatibility and compressor oil compatibility, then select oils and lubricants specified for that refrigerant system to ensure proper seal, lubrication, and mineral or synthetic compatibility.
When Is It Time to Replace the Entire Air Tank?
When to replace tank: we replace it when wall thickness or corrosion falls below safe thresholds, or if a leak exceeds spec. Tank replacement criteria: inspect, pressure test, and consider a replacement if 1 in 4 defects appear.
Conclusion
We’ve laid out a practical, repeatable plan you can trust. Think of maintenance like a well-tuned instrument: a small daily note keeps the whole symphony in tempo. In one shop, a technician logged three minutes daily for diagnostics and cut downtime by 40% in a month. Stick to the quick-start baseline, daily checks, and the PM cadence, and you’ll minimize surprises, extend compressor life, and keep safety at the forefront. Your reliable system starts with disciplined routine.

